Are you creating videos in Kinemaster and thinking how to add unique fonts?
You’re in the right spot! In this guide, I’ll walk you through the process of adding fonts in Kinemaster, including how to use external fonts that aren’t present in the app’s built-in library.
Why Add Custom Fonts in Kinemaster?
KineMaster has lots of fonts built in, and you can also download more fonts if you need them. But, if you need a special font that’s not in the default selection, you can add new fonts from outside the app to make your videos look just the way you want.
Understanding Kinemaster’s Font Options
Before we start adding fonts, let’s look at what Kinemaster offers:
- Built-in Fonts: Kinemaster already has several fonts you can use right away.
- Font Library: You can also download more fonts from a large collection and use them in your projects.
How To Add Fonts in Kinemaster
Step 1: Open a New Project
Start by opening Kinemaster and creating a new project. This is your workspace where you’ll be adding and editing your content.
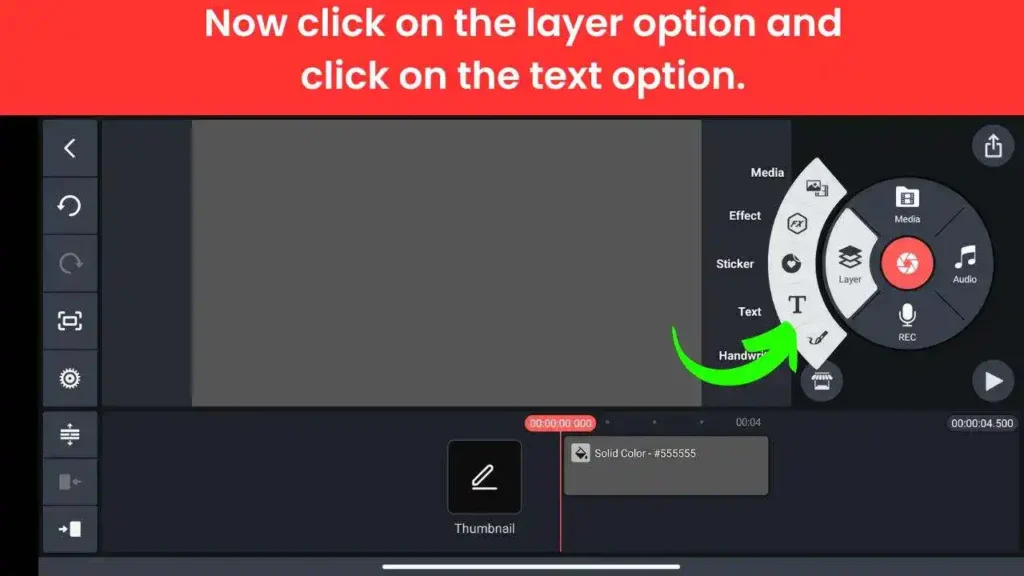
Step 2: Add a Text Layer
Click on the “Layer” option, then select “Text.” This allows you to add text to your video.
Step 3: Enter Your Text
Type in the text you want to include in your video. This will be the content you apply your font to.
Step 4: Access Font Options
After typing your text, click on the “Fonts” option located on the right side of the screen. This will take you to the font selection menu.

Step 5: Choose from Kinemaster’s Font Library
In the Fonts menu, you’ll see two options:
- Kinemaster Font Library: Here you can choose and download additional fonts that are available within Kinemaster.
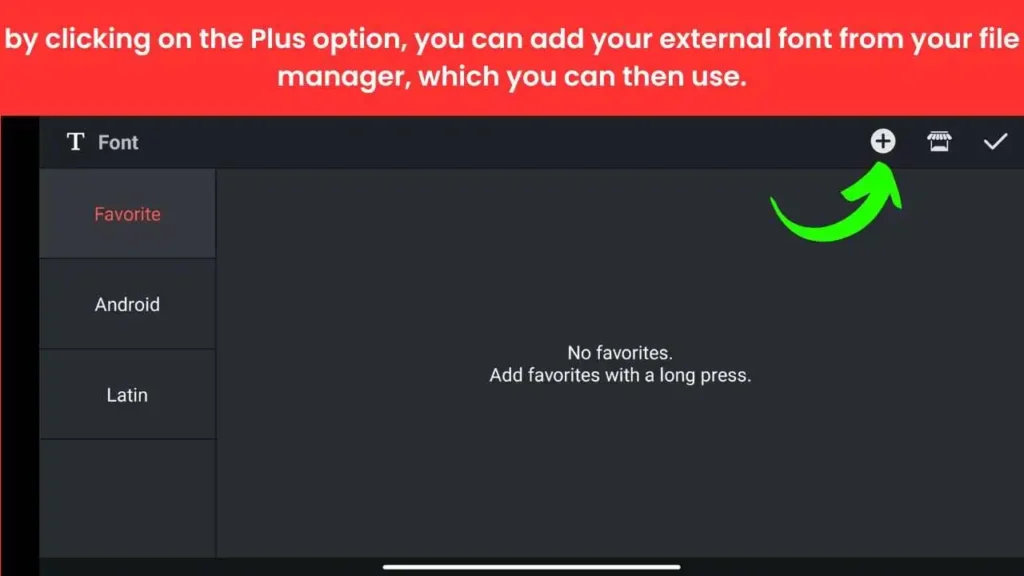
- Plus (+) Icon: Click on this to add external fonts from your file manager. This is where you can upload custom fonts that are not included in Kinemaster’s default library.
Step 6: Add External Fonts
Select the “Plus (+)” icon, navigate to your file manager, and choose the external font file you want to use. Once added, you can apply this font to your text.
Tips for Picking the Perfect Font
Choosing the right font can make your videos look better and easier to read. Here’s how to pick the best one:
- Match the Font to Your Video: Pick a font that fits the theme and mood of your video.
- Make It Easy to Read: Choose a font that’s clear and simple, even if the text is small or the background is busy.
- Adjust Size and Spacing: Set the font size and spacing so that the text is easy to see and read.
Conclusion
In this article, we showed you how to add new fonts to KineMaster. This way, you can make your video text unique with fonts that are not in the default options. For more tips and tricks on KineMaster and other editing tools, check out our website. Thanks for reading!